
 When remodeling a home, good lighting should be a chief concern. Improving your home’s lighting can even be a dramatic home makeover by itself.
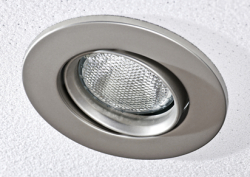
Recessed can lighting in particular can turn a dreary room into a fresh, open, modern space. Consider the benefits of can lighting:
- Clean, modern look
- Rooms seem bigger, ceilings seem higher
- Timeless style — no fixtures that go out of fashion
- No dusting and less upkeep
- Custom placement for perfect lighting throughout the home
Can lighting remodeling projects bring beautiful, high-impact results on the look of your home. Because electrical wiring is involved, always call your local electrician for help with technical and difficult parts of the process. It’s better to avoid injury, prevent the risk of house fire, and save yourself a ton of time by calling in an expert for the electrical work.
Convert a Ceiling Fixture to Can Lighting
Switching from ceiling fixtures to can lights can be a simple remodeling job, but the electrical wiring should be left to a professional. Here’s what the job entails:
- Turn off the circuit breaker that controls the light fixture.
- Remove the fixture carefully and use a voltage tester to confirm that power is off.
- Measure for obstructions. Make sure that your can lighting will fit into the cavity before proceeding.
- Begin the electrical work: wires will need to be disconnected from the light. You will probably need to label the wires as you unscrew them, so you can reconnect them accurately. If you are unsure how to handle this step, call an electrician to handle the wiring!
- The wiring now must run through a junction box or outlet. This step also requires detailed electrical work: cutting wires, measuring and removing wire insulation, twisting and securing wires to the correct locations.
- The wires must be spliced and connected to the can lighting fixture and covered with a splice box.
- Turn on power to test before patching and refinishing any holes or damage.
Add Can Lighting to an Existing Ceiling
Every space in the home should have good lighting. You can add can lights to a ceiling without any lights currently in much the same manner as a conversion. However, you will need new wiring to the area, and that typically requires a professional electrician.
Here’s an overview of adding can lights to a ceiling:
- Choose your desired locations and test for obstructions. First use a stud finder to avoid ceiling joists. Then you will need to drill pilot holes in your desired locations and make sure there are no obstructions above the ceiling.
- Saw your holes using a keyhole saw.
- Run wiring from a nearby junction box to your new can lighting locations. Secure ample wiring to the junction box and near the lights.
- If you cannot find a nearby junction box, you need new wiring to the area. Call an electrician unless you’re proficient in that task.
- Connect the wiring to the can lighting unit. Again, if you are uncomfortable or unfamiliar with stripping wires and connecting them with wire nuts, you should be calling an electrician for at least this portion of the job.
- Mount the can lighting securely into the hole and connect the wiring at the junction box.
Ready to begin? Pick out your can lighting units and trim and call the best electrician in Marin and Sonoma Counties for help with the electrical work!