
Upgrading from a fuse box to a circuit breaker brings your home electrical system into the modern age. More power, better safety, and the convenience of flipping breakers rather than replacing blown fuses. When buying, selling, or insuring a house, all the experts will tell you that you are better off replacing a fuse box.
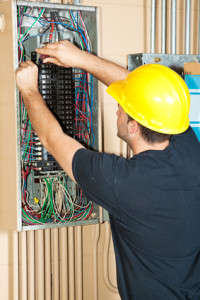
Your electrical panel is the central command of the electrical system. Without question, changing a fuse box is not a good DIY opportunity. If you have electrical experience and want to do it, or you are curious about what the process entails, read on. Give us a call when you’re ready to schedule an appointment.
Step by Step Instructions for Upgrading to a Circuit Breaker
Before changing the fuse box, we’ll need to do some research and gathering. A licensed electrician can tell you whether it’s safe to upgrade only the fuse box or if more changes should be done at the same time. Then, assuming you want to increase from a 60-amp fuse box to a 100-amp or higher breaker panel, you need to ask the utility company to increase the service.
Here’s a basic rundown of how to change a fuse box to a circuit breaker:
1. Diagram the electrical panel and make a list of breaker sizes. Look at the wire gauges to confirm the amperage. A previous owner might have added wrong sizes of fuses.
2. Obtain all the parts you need, as well as insulated tools and electrician gloves. Most everything will be readily available at the hardware store.
3. Turn off power at the main disconnect. Power will still flow unless your utility has shut off power to the whole house, so always be careful.
4. Remove the fuses, disconnect wires, dismount clamps. The two hot wires should be taped off to prevent injury. Keep things organize as you deconstruct the fuse box.
5. Prepare the circuit breaker panel. Knock out the metal tabs with a tool, matching the entry points to where the existing wires are.
6. Slide the panel box over the pipe from the disconnect. Then you can mount the box to the wall.
7. Attach the circuit wires. Start with the heavier gauges because they will be harder to position if other wires are already in place. Note: You will need to cut and crimp wires, so have the right tools handy.
8. Attach the breakers. Each breaker will connect to a hot wire, a ground wire, and a neutral wire that runs to the neutral bus bar.
9. Mount the cover plate. Knock out tabs for the spots with breakers and leave the other knockouts in place.
10. Turn the main ‘disconnect’ back on only when you have double-checked the wiring and assured all connections are tight.
Sounds relatively simple, right? Unfortunately, you are likely to encounter some problems along the way. For one, the old fuse box likely has damage or corrosion — making it difficult to safely disconnect everything and indicating that you need repairs other than simply switching out to a breaker panel.
Between the safety hazards of the task and the absolute need for proper wiring, this job should be left to a professional residential electrician. If you have electrical knowledge and still want to undertake this task, be sure to have an electrician inspect everything before and after. It’s easier to get the right electrical work done the first time rather than finding out later you need various updates to the rest of the system. So contact us without further delay!