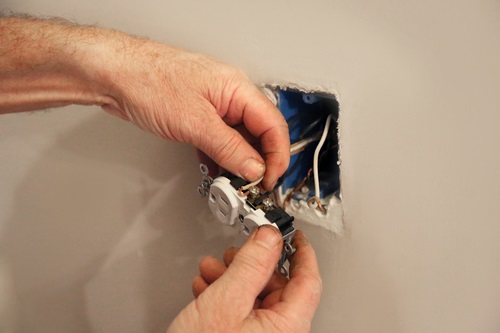
Many people forget to account for the electrical wall socket depth when replacing a kitchen backsplash, altering a wall, or performing other home improvement projects around the electrical outlets. At the end of the project, you realize that the socket now sits back perhaps a half-inch or more.
Spacers can be added to wobbly wall socket — and it’s a highly recommended step! You want the outlet cover to sit flush with the wall so it looks right. Loose sockets are also a safety hazard that needs to be corrected, because pushing and pulling on a plug can loosen the wall socket and potentially create a wiring problem or spark danger.

There are 3 kinds of wall socket spacers that might suit your needs:
- Electrical box extender: This is a rectangular piece of plastic that mounts around the box, behind the ears where the box is screwed in.
- Wall socket spacers: These are small plastic bits that come in 1/8” increments and fold like an accordion, so you can use however many you need. The spacers mount directly behind the ears.
- Washers: The simplest solution, you can just put washers under the screws to add depth. You’ll need to switch out the screws for a longer version of the same diameter as what you have. This is a fine option if your socket is barely loose and you just need a few spacers.
Installing a Spacer for a Loose or Deep Wall Socket
The most important part of adding a spacer to a wall socket is that you turn off power to all outlets that you will be working on and use a voltage detector to make sure that no current is flowing to the wires or box. It’s always safest to use an insulated screwdriver and safety gloves, too.
To install a box extender, first take measurements and make sure the one you buy will fit. There are many sizes and depths available. When you’re ready, remove the face plate and unscrew the wall socket. Pull it all forward and thread it through the extender. Push the extender into the hole until it lines up with the face of the wall. You can now screw the ears of the socket into the extender and then mount the face plate.
Wall socket spacers are often easier — they are more adjustable, so you can use them for virtually any depth. After removing the cover, measure the depth from where the ears currently sit to the face of the wall. Count how many spacers you need to add, and break them off of the pack. Fold the spacers accordion-style and place behind the ears, and screw the socket back on. Remember, you’ll need longer screws than the socket currently has.
Adding washers works much like the spacers — just add several under the screw with a trial-and-error method until the wall socket sits flush. The downside is that the washers might not be enough to prevent a wobbly, loose wall socket if there is too big a gap in the wall. But if you have the washers sitting around, you might as well try.
If you are not comfortable opening up the wall outlet and handling the parts, contact us to take care of this. We can get the job done very quickly and safely, and we can probably produce a better looking, tighter fitting result than an amateur.

